November 09, 2022
How to Change a Tyre in 10 Steps
Knowing how to change your tyres is VITAL if you regularly drive.
We all know flat tyres can happen when you least expect it, and searching for "tyre change near me" or "replace tyres near me" may not always work, especially when you're in an area that's out of coverage.
But the good news is that changing a tyre is easy once you know the necessary tools and steps. Tyroola shows you how with our 10-step guide.
Also read: Top 8 Causes of a Flat Tyre
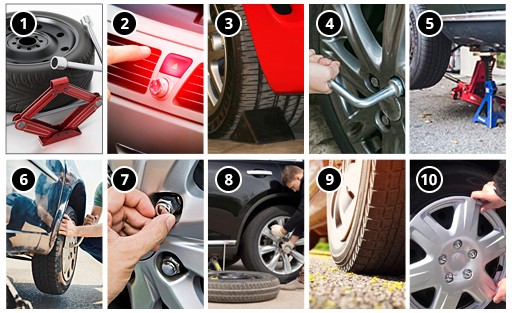
How to Change Tyres in 10 Steps
A car tyre change usually takes about 15 to 30 minutes, depending on your skill level. But speed isn't the issue; your attention to detail is more important. To complete a tyre change, you must follow all the steps correctly. Missing out on any of them could compromise your safety. You don't want your newly changed tyre to fly off your wheel since it wasn't fastened properly.
To master the skill, try practising changing tyres at home.
Step #1: Prepare your tools.
Make sure that you ALWAYS have your tyre changing tools in your vehicle in case of an emergency tyre change.
Must-Haves

Jack

Lug wrench

Properly inflated spare tyre

Owner's manual
Good-to-Haves

Working flashlight

Gloves

Wheel chocks

2"x6" wood to secure the jack
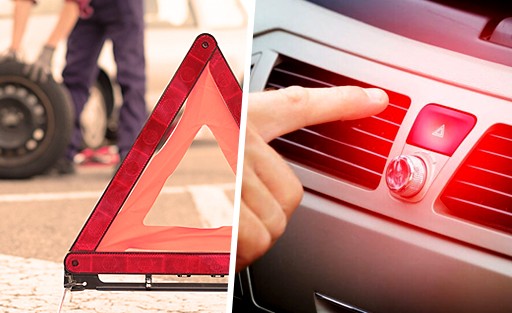
Step #2: Park safely and switch on your hazard lights.
Once you see (or feel) that you have a flat, slow down immediately. Reduce your speed and look for an ideal place to park. Don't slam on the brakes or make sudden turns, which may cause your car to tilt. Coasting to a stop lets your car balance out after a flat tyre.
When looking for a tyre-changing spot, make sure it's:
-
Flat and solid to keep your vehicle from rolling.
-
A reasonable distance away from traffic.
-
A straight (instead of curvy) path so oncoming drivers can see you.
Turn on your hazard lights as soon as you park to prevent accidents. If you have a warning triangle, place it behind your car.
Step #3: Use the parking brake and wheel chocks.
Secure your vehicle by applying the parking brake and placing wheel chocks behind or in front of your working tyres. This ensures your vehicle stays in place and doesn't roll when changing tyres.

💡Pro-Tip: If you have a flat rear tyre, the wheel chocks should go in front of your front tyres. Place the chocks behind your rear tyres if a front tyre is flat. Don't have chocks? Use rocks, bricks or other heavy objects.
Step #4: Unfasten the hubcap and loosen the lug nuts.
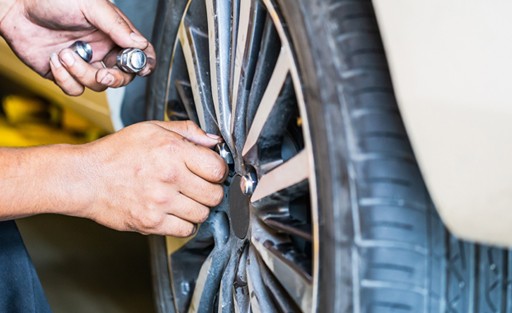
After removing the hubcap, loosen the nuts using the level end of your lug wrench and apply your body weight. Turn it counterclockwise, but remember not to remove the lug nuts completely. You just want to break their resistance.
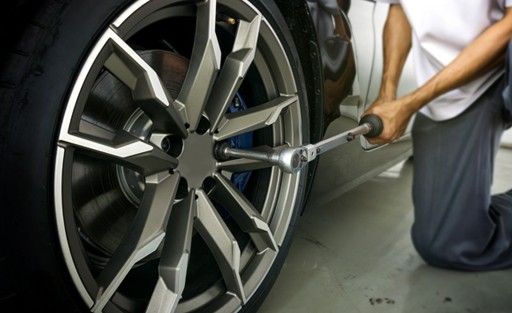
💡Pro-Tip: Some vehicles don't have hubcaps and have their lug nuts exposed, making your work easier!
Step #5: Put the jack under your vehicle and raise it.
Position the jack under the vehicle frame beside the flat tyre. Make sure that the jack kisses the metal part of the frame. If your vehicle's bottom is lined with plastic, look for the exposed metal reserved for the jack. Once the jack is secure, lift the vehicle until it's about half a foot (6 inches) from the ground.
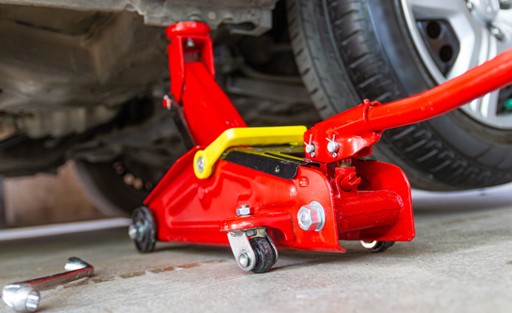
💡Pro-Tip:To stabilise the jack and vehicle, try putting the 2" x6" wood under the jack. This technique comes in handy when changing tyres on rough surfaces like asphalt.
Step #6: Remove the lug nuts and flat tyre.
Remember the lug nuts you loosened earlier? Now is the time to completely remove them by hand. Once you've set aside the lug nuts (best to keep them in a container like a cup so they won't get lost), it's time for the tyre removal. Detach the flat tyre by pulling it carefully toward yourself.

Step #7: Fit the spare tyre & tighten the lug nuts by hand.
Position the spare tyre on the hub, aligning its rim with the lug bolts. But be careful! These different tread patterns have different mounting positions.
Asymmetric Tyres
- Have different tread patterns on both sides.
- May be mounted on front or rear.
- Sidewall says, "mount this side out" as a guide.
Directional Tyres
- Have V-shaped treads.
- May be only mounted on the same side of the vehicle.
- Sidewall has an arrow to indicate mounting direction.
However, you can still mount a directional spare tyre on the "wrong" side—if it's for only temporary use. That's why driving to the nearest station is important to have your flat tyre repaired or replaced as soon as possible.
Once you've fitted the spare tyre, turn them clockwise with your hand, tightening them as best as possible.
Also read: Your Guide to Tyre Tread Patterns
Step #8: Lower your vehicle and re-tighten the nuts.
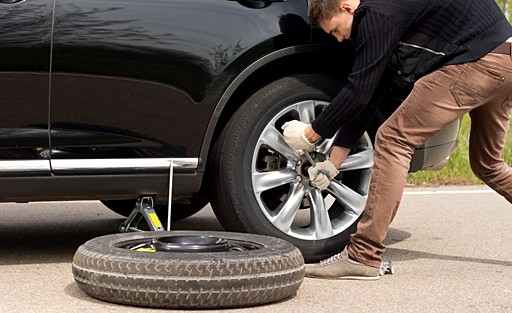
By using the jack, let your vehicle down—but not completely. The spare tyre should make contact with the ground, but it shouldn't bear your vehicle's total weight. Use the wrench to tighten the lug nuts fully.
Step #9: Bring your vehicle down to the ground.
It's time to let your spare tyre bear the brunt of your vehicle. Completely lower your vehicle and detach the jack. To ensure the lug nuts are secure, use the wrench to check if they're snug enough.

Step #10: Attach the hubcap & pack away the equipment.
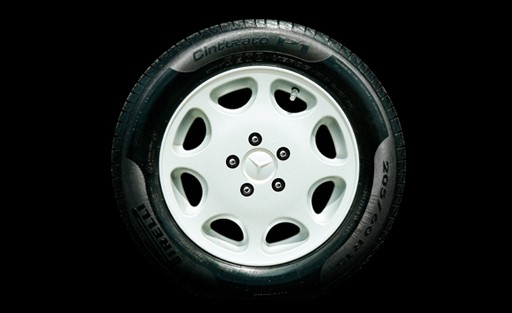
Replace the hubcap, and gather all your equipment to put them back in your vehicle. Make sure you don't leave anything behind before driving away.
Additional Tyre-Changing Tips
Congratulations! Now that you've changed your flat tyre, you can continue your journey. But make sure to follow these tips to ensure your safety:
• Go to a tyre technician right away.
Don't drive on a spare tyre for long. If you're using the smaller space saver tyre or doughnut, you can only move at mid-speed for about 80 kilometres. If you max out on this distance, you won't be able to reuse your space saver tyre. Repair or replace your flat tyre immediately.
Also read: Standard Spare Tyres vs. Space Saver Tyres: Which Is Better
• Check the spare tyre's pressure.
Stop by a service or petrol station to properly inflate your spare tyre. A full-sized spare tyre requires the same air pressure as your other tyres. But for a space saver tyre, the proper pressure is 420 kPa (60 psi). If your spare is underinflated, drive slowly to the nearest service station—or you'll end up with a flat spare tyre with no replacement.
• Choose your wrench wisely.
X-shaped wrenches, also called cross wenches, give a much stronger pull on the lug nuts than an L-shaped wrench.
• Take caution if you're changing tyres on the roadside.
The ideal changing spot is away from the traffic, but if you have no choice but to park by the road, be extra aware of your surroundings. Watch out for vehicles driving too close to you.
• Practise proper tyre maintenance.
Ensuring your tyres are in good working condition is the key to avoiding flat tyres. Follow these tyre maintenance steps:
✅ Check tyre pressure once a week in the morning before driving. Doing this when your tyres are "cold" ensures an accurate reading. Underinflation is the number one cause of flat tyres.
✅ Conduct tyre rotation to ensure even tread wear.
✅ Monitor your tyres for damage, such as uneven wear, bulges, cracks, and punctures.
✅ Read your owner's manual for complete guidance on how to care for your tyres—including their speed and load ratings.
• Consider run-flat tyres.
If changing tyres gives you anxiety, try switching to run-flat tyres, which lets you drive for an additional 80 kilometres even when punctured. This gives you enough time to drive to a service station for a tyre change or repair.
Also read: 8 Things You Need to Know About Run-Flat Tyres
Get Big-Brand Tyres Minus the Huge Cost
You don't have to worry about the cost of replacing tyres! Tyroola guarantees the cheapest prices online and a wide range of premium, value, and budget tyres. With brand-new tyres, you're sure that you and your loved one are always safe on the road.
Shop at Tyroola now and get the best deals and discounts that keep you and your budget safe!


